Note
Access to this page requires authorization. You can try signing in or changing directories.
Access to this page requires authorization. You can try changing directories.
Note
This feature is currently in public preview. This preview is provided without a service-level agreement, and isn't recommended for production workloads. Certain features might not be supported or might have constrained capabilities. For more information, see Supplemental Terms of Use for Microsoft Azure Previews.
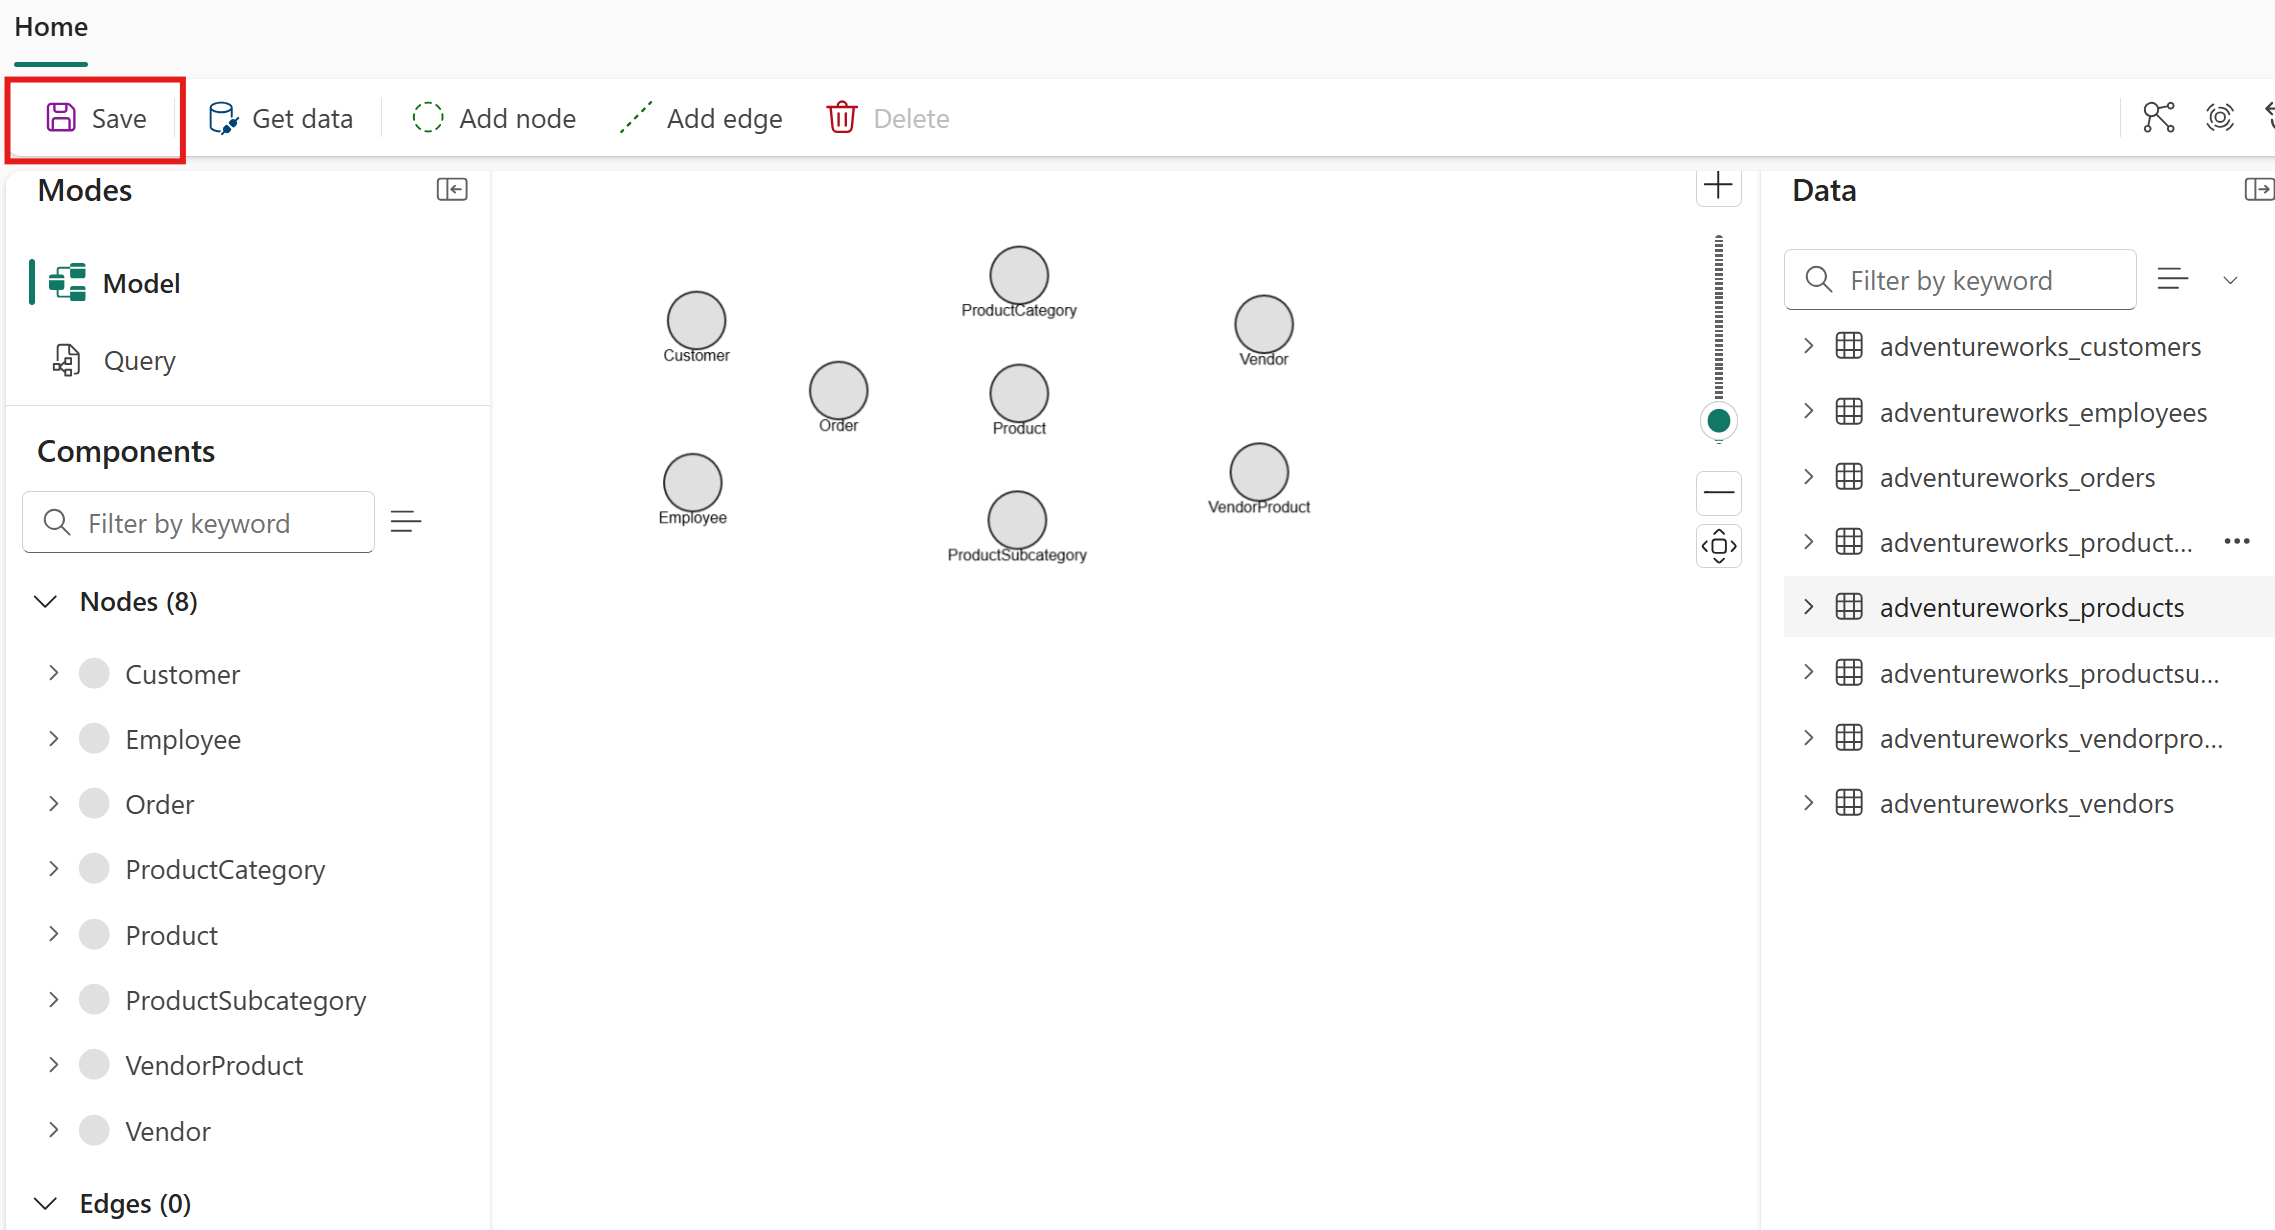
In this tutorial step, you add node types to your graph model. Node types represent entities in your data, such as customers, products, or orders. Later, you connect these node types with edge types to define relationships between them.
Adventure Works node mappings
In the Adventure Works data model, create a node type for each entity. The following table shows the node mappings. Use this information to add node types to your graph:
| Node type label | Mapping table | ID of mapping column |
|---|---|---|
Customer |
adventureworks_customers | CustomerID_K |
Employee |
adventureworks_employees | EmployeeID_K |
Order |
adventureworks_orders | SalesOrderDetailID_K |
ProductCategory |
adventureworks_productcategories | CategoryID_K |
Product |
adventureworks_products | ProductID_K |
ProductSubcategory |
adventureworks_productsubcategories | SubcategoryID_K |
VendorProduct |
adventureworks_vendorproduct | ProductID_FK |
Vendor |
adventureworks_vendors | VendorID_K |
Add node types to the graph
To add node types to your graph, follow these steps:
In your graph model, select Add node to add a new node type to your graph.
In the Add node to graph dialog, enter a Label name and select the appropriate Mapping table and ID of the mapping column.

For example, for the first node, use these values:
- Label:
Customer - Mapping table: adventureworks_customers
- ID of the mapping column:
CustomerID_K
Tip
You can set compound keys (IDs consisting of multiple columns). After you select a mapping table, choose one ID from the ID dropdown, then use the dropdown again to add another.
- Label:
Select Confirm to add the node type to your graph.
Repeat the process for all remaining node types listed in the Adventure Works node mappings table.
You see all eight node types represented in your graph. Select Save to save your progress.


Understand node properties
When you add a node type, every column in the mapping table automatically becomes a property on that node type. You don't need to add properties manually. To see the properties for a node type, double-click it in the graph model editor to open the Edit node schema dialog.

For this tutorial, keep all properties on every node type. In a later step, you extract a column into its own node type and remove redundant properties. For details, see Model a node and edge from the same table. For general guidance on choosing which properties to keep or remove, see Remove unnecessary properties.
After you add node types to your graph, add edge types to define the relationships between them.