Note
Access to this page requires authorization. You can try signing in or changing directories.
Access to this page requires authorization. You can try changing directories.
Batch upgrade enables you to apply consistent modernization plans across multiple repositories simultaneously. This article shows you how to upgrade multiple applications efficiently at enterprise scale.
By using batch upgrade, you can:
- Upgrade multiple applications simultaneously by using the same upgrade target.
- Apply consistent patterns by using similar upgrade patterns across applications.
- Leverage parallel execution when delegating to cloud agents.
Batch upgrade provides the following benefits:
Consistent execution:
- Standardized approach: Apply the same modernization patterns across all repositories.
- Reduced variability: Ensure consistent upgrade paths for similar applications.
- Reusable strategies: Use organization-specific skills across applications.
Scale and efficiency:
- Parallel processing: Use cloud agents to process multiple repositories simultaneously.
- Automated workflows: Integrate with CI/CD pipelines for scheduled modernization.
- Time savings: Reduce total modernization time from weeks to hours.
Prerequisites
- Modernize CLI.
- A completed batch assessment (recommended but not required).
- All repositories use the same programming language (Java or .NET).
- Access to all repositories you want to upgrade.
- GitHub authentication configured (
gh auth login).
Important
All repositories in a batch upgrade must use the same programming language. If a repository uses a different language, the batch upgrade marks the repository as failed and skips it.
Configure repositories
The modernization agent supports multiple ways to specify the repositories you want to upgrade:
- Current folder: Upgrade the project in your current working directory.
- Manual input: Enter local directory paths or remote Git URLs directly.
- Repository config file: Use a JSON config file that lists all repositories.
Repository config file
For batch operations across many repositories, create a JSON config file to list all repositories. For example, create it at .github/modernize/repos.json in your working directory, or provide a custom path.
Tip
For sample repositories, fork them first and make sure you have admin permission to delegate the job to cloud agents.
Simple format (array of repositories):
[
  {
    "name": "PhotoAlbum-Java",
    "url": "https://github.com/Azure-Samples/PhotoAlbum-Java.git"
  },
  {
    "name": "ZavaSocialFrontEnd",
    "url": "https://github.com/Azure-Samples/ZavaSocialFrontEnd"
  }
]
Full format (with branch and local paths):
{
  "repos": [
    {
      "name": "PhotoAlbum-Java",
      "url": "https://github.com/Azure-Samples/PhotoAlbum-Java.git",
      "branch": "main"
    },
    {
      "name": "local-project",
      "path": "/absolute/path/to/project"
    }
  ]
}
Each repo entry supports the following fields:
| Field | Description | Required |
|---|---|---|
name |
A friendly name for the repository (used in reports and dashboards). | Yes |
url |
Git clone URL in HTTPS or SSH format. | One of url or path |
path |
Absolute local directory path. | One of url or path |
branch |
Branch to check out after cloning. | No |
description |
Human-readable description. | No |
Tip
You can include repositories from different organizations and use different authentication methods as long as you have access.
The modernization agent automatically detects the repos.json file at .github/modernize/repos.json when you select From a config file in interactive mode. You can also provide a custom path.
Choose your execution mode
Batch upgrade supports two execution modes and two interaction methods:
Execution modes
Local execution
- Best for: Testing, smaller sets of repositories (1-5 repos), or when you prefer local control.
- How it works: Processes repositories sequentially on your local machine.
- Setup required: None beyond the basic prerequisites.
- Supports: Both Git URL and local path repositories.
Cloud agent delegation
- Best for: Enterprise-scale operations, large portfolios (5+ repos), or parallel processing.
- How it works: Submits tasks to GitHub cloud agents for parallel execution in the cloud.
- Setup required: MCP server configuration in each repository (configured during setup).
- Supports: Only repositories with GitHub (github.com) URLs. Local paths and non-GitHub providers aren't supported.
Important
Cloud agent delegation requires repositories to have GitHub (github.com) repository URLs. Repositories specified with local paths or hosted on non-GitHub providers (GitLab, Azure DevOps) are skipped during cloud delegation. Use local execution for those repositories.
Tip
By processing repositories in parallel, cloud agent delegation can reduce total modernization time from hours to minutes.
Interaction methods
Interactive mode (TUI)
- Guided experience with menus and prompts.
- Best for first-time users or when you want to review options.
- Supports both local and cloud execution.
Non-interactive mode (CLI/headless)
- Command-line based, fully automated.
- Best for CI/CD pipelines and automation.
- Supports both local and cloud execution with
--delegate cloudflag.
Note
You can combine any execution mode with any interaction method. For example:
modernize→ select Upgrade (interactive, local)modernize→ select Upgrade > Delegate to Cloud Agents (interactive, cloud)modernize upgrade "Java 21" --source ./repos.json(non-interactive, local)modernize upgrade "Java 21" --source ./repos.json --delegate cloud(non-interactive, cloud)
How batch upgrade works
The batch upgrade workflow:
- Language detection: Automatically detects the project language (Java or .NET) from the first repository.
- Plan creation: Creates an upgrade plan based on your prompt or uses latest LTS versions.
- Execution: Applies the upgrade to each repository.
- Validation: Builds and validates changes for each repository.
Run batch upgrade
After you configure your repositories and choose an execution mode, start the batch upgrade.
Interactive mode (upgrade locally)
Run the modernization agent:
modernizeSelect Upgrade from the main menu.
○ How would you like to modernize your app?

    Assess
    Analyze modernization readiness across one or multiple applications
    Plan
    Generate a structured plan to guide the agent
    Execute
    Run the tasks defined in the modernization plan

  Or select a quick-start scenario:

  > Upgrade
    Upgrade runtimes and frameworks across one or multiple applications
Choose how to specify your target repositories. Select From a config file to use a
repos.jsonfile.○ Choose target repositories 1. Current folder /Users/username/project 2. Manual input Enter local path or remote URL > 3. From a config file /path/to/.github/modernize/repos.jsonTip
You can also select Manual input to enter local paths or remote Git URLs directly, or Current folder to upgrade the project in your current directory.
If the
repos.jsonfile is detected at the default location, the agent automatically fills it in. Otherwise, enter the path to your config file and press Enter.All repositories are selected by default. Deselect any repositories you want to skip, and then press Enter to confirm your selection.
- Use arrow keys to navigate and press Space to toggle individual repositories.

Choose the execution mode. Select Upgrade locally.
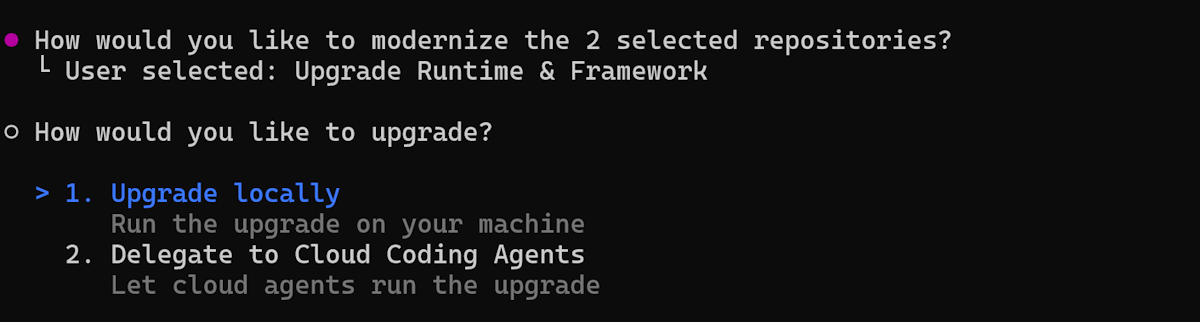
Enter the upgrade target prompt (for example,
Java 21or.NET 10) or press Enter to accept the default (latest LTS version).The agent automatically:
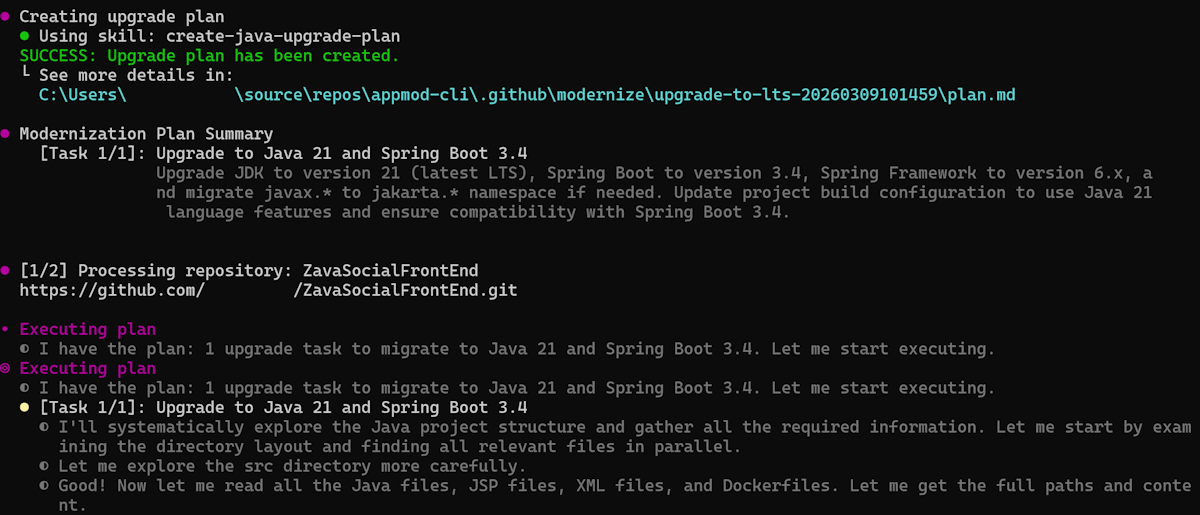
- Creates an upgrade plan based on your request.
- Applies the plan to each repository sequentially.
- Builds and validates each repository after changes.
- Displays progress and summary for each repository.


Interactive mode (delegating to cloud agents)
Prerequisites: Configure MCP server
Before running the upgrade, configure the GitHub Copilot Modernization MCP Server in each repository.
For Java applications, add this configuration in the Cloud agent section of your repository settings:
{
"mcpServers": {
"app-modernization": {
"type": "local",
"command": "npx",
"tools": [
"*"
],
"args": [
"-y",
"@microsoft/github-copilot-app-modernization-mcp-server"
]
}
}
}

Steps
Run the modernization agent:
modernizeSelect Upgrade from the main menu.
○ How would you like to modernize your app? Assess Analyze modernization readiness across one or multiple applications Plan Generate a structured plan to guide the agent Execute Run the tasks defined in the modernization plan Or select a quick-start scenario: > Upgrade Upgrade runtimes and frameworks across one or multiple applicationsChoose how to specify your target repositories. Select From a config file.
○ Choose target repositories 1. Current folder /Users/username/project 2. Manual input Enter local path or remote URL > 3. From a config file /path/to/.github/modernize/repos.jsonIf the
repos.jsonfile is detected at the default location, the agent automatically fills it in. Otherwise, enter the path to your config file and press Enter.All repositories are selected by default. Deselect any repositories you want to skip, and then press Enter to confirm your selection. Use arrow keys to navigate and press Space to toggle individual repositories.
Choose the execution mode. Select Delegate to Cloud Agents.
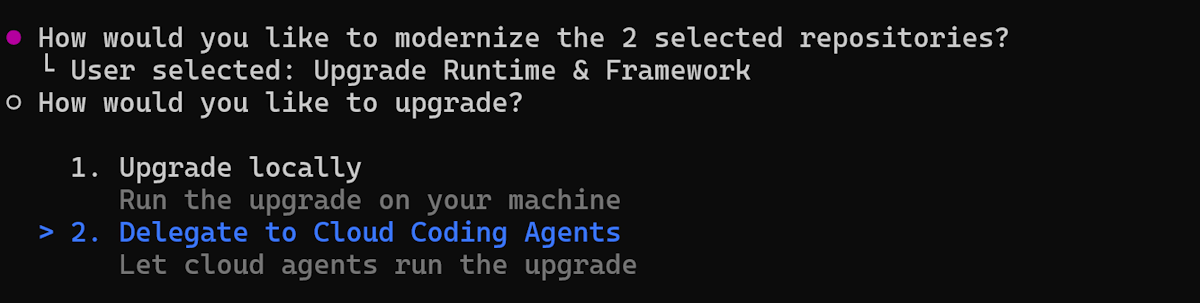
Enter the upgrade target prompt (for example,
Java 21) or press Enter to accept the default.The agent automatically:
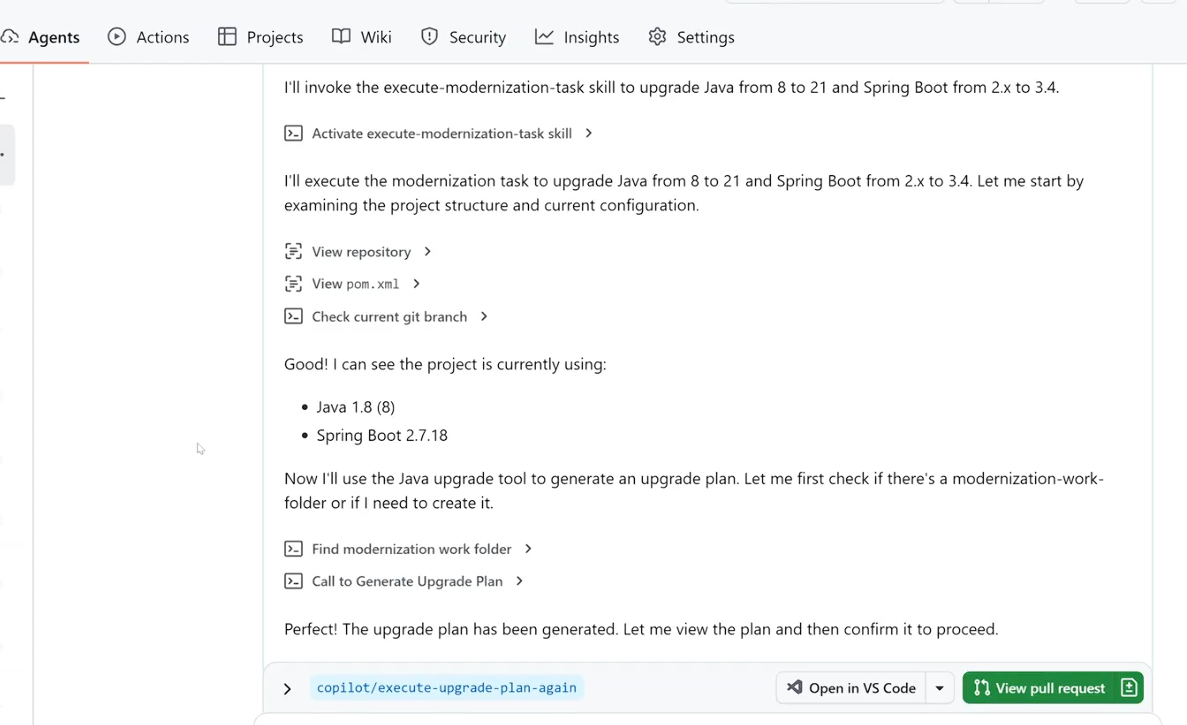
Creates upgrade plans for each repository.
Submits a cloud agent job for each repository.
Runs jobs independently in parallel in the cloud.
Displays job IDs and PR URLs for each repository.
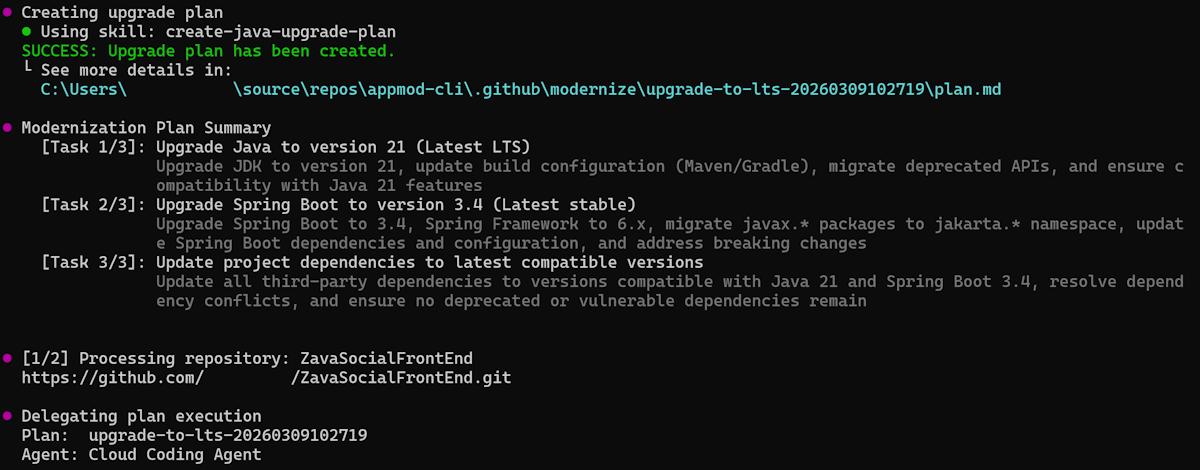
Delegates tasks to AgentHQ for parallel execution.
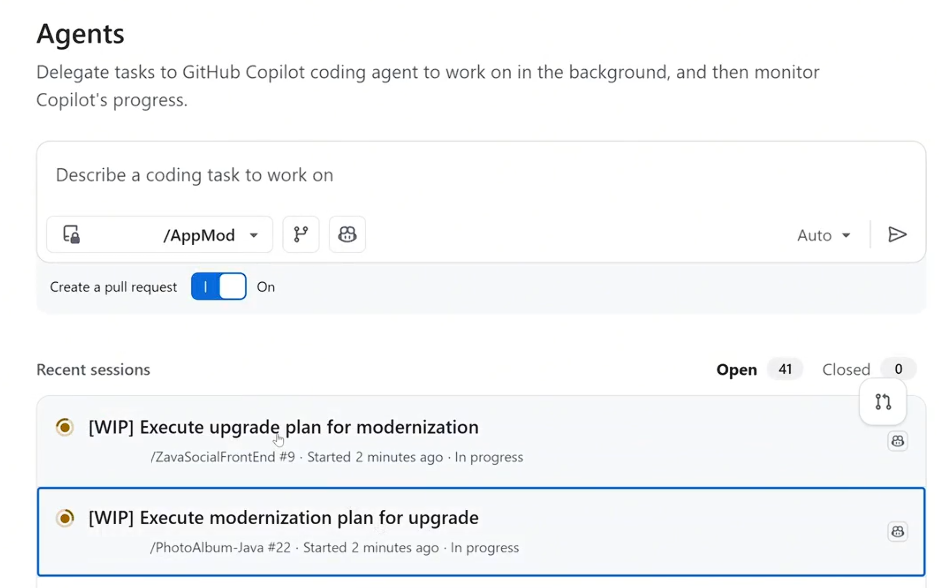
Tracks progress for each individual task in real-time.
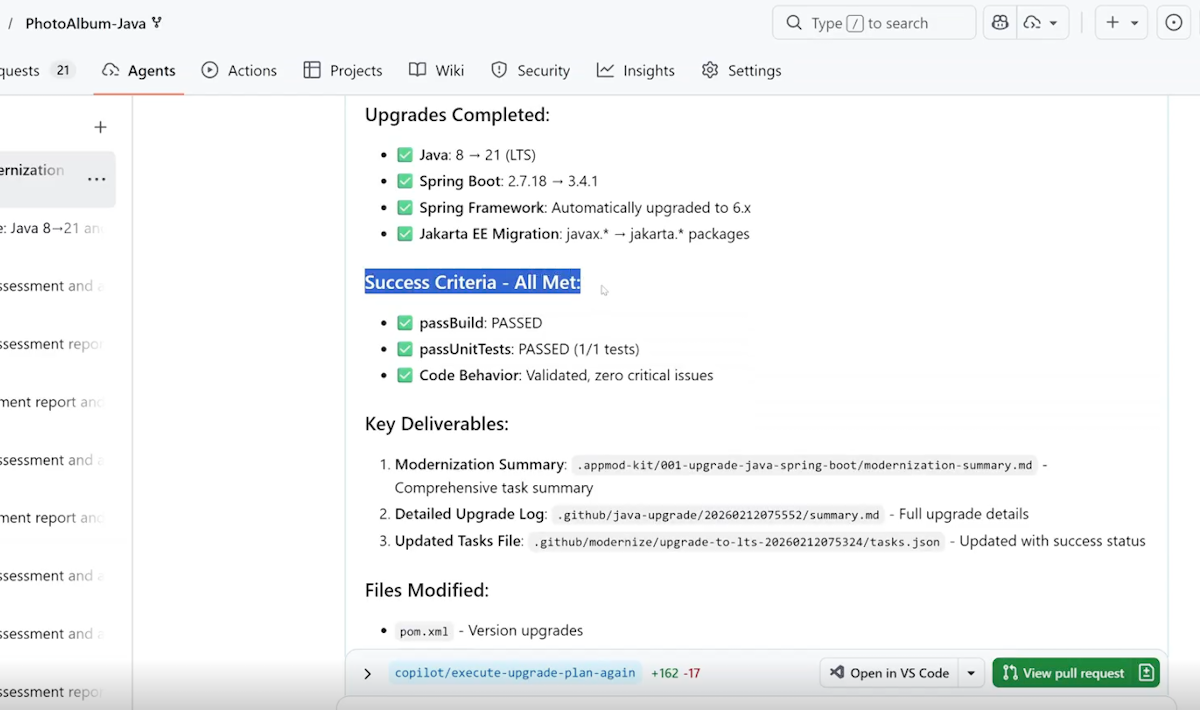
Displays upgrade summary for each completed task.


Non-interactive mode (CLI)
For automation and CI/CD integration, use the modernize upgrade command:
Upgrade locally using a repository config file:
modernize upgrade "Java 21" --source .github/modernize/repos.json
Upgrade multiple repositories by specifying sources directly:
modernize upgrade "Java 21" --source https://github.com/org/repo1 --source https://github.com/org/repo2
Upgrade using cloud agents:
modernize upgrade "Java 21" --source .github/modernize/repos.json --delegate cloud
Note
For batch headless execution and more CLI options, see the Multi-repository configuration section in the CLI commands reference.
Review results
When the batch upgrade finishes:
Check the aggregated report displayed in the terminal.
Review individual repository changes:
cd <repository-name>
git status
git diff
Create pull requests for successful upgrades:
cd <repository-name>
gh pr create --title "Upgrade to Java 21" --body "Automated upgrade by modernization agent"
Troubleshooting batch upgrades
Common problems
Repository access errors:
- Verify GitHub authentication by using
gh auth status. - Make sure you have access to all repositories in
repos.json.
Language mismatch errors:
- Make sure all repositories in
repos.jsonuse the same language (Java or .NET). - Create separate batch operations for different languages.
Clone failures:
- Verify repository URLs in
repos.jsonare correct and accessible. - Make sure you have proper access permissions to all repositories.
- Check network connectivity and VPN settings.
Build failures after upgrade:
- Review build error messages in the aggregated report.
- Check if you need to update other dependencies.
- Verify compatibility of third-party libraries with the new version.
Individual repository failures:
- The batch process continues even if individual repositories fail.
- Review the aggregated report to identify failed repositories.
- Check error logs for specific error messages.
- Retry failed repositories individually.
Cloud agent failures:
- Check GitHub Actions permissions and quota limits.
- For .NET Framework, make sure Windows runner configuration is properly set.
Next steps
After completing batch upgrade, you can:
Continue improving:
- Run batch assessment - Reassess to verify improvements and identify new opportunities.
- Create custom skills for organization-specific patterns - Capture successful patterns for reuse.
Learn more:
Provide feedback
We value your input! If you have any feedback about batch upgrade or the Modernization agent, create an issue at the github-copilot-appmod repository or use the GitHub Copilot modernization feedback form.